Statement:
This cursed image 100 points
I know I put it somewhere, but where..
File for the challenge: https://mega.nz/#!YcBw2A4K!jUqgKnf5YZhmjZtpNEH7jM3h2rQ4KyvrOiBaLYmdWys
Key format:
– SHA256 of the key
– No spaces
– Uppercases, lowercases, numbers and special characters exactly as they appear in the file of the challenge
Solution:
In this challenge we are asked to download a tar.gz file that contains the file image.raw.
File command returns the following information:
![]()
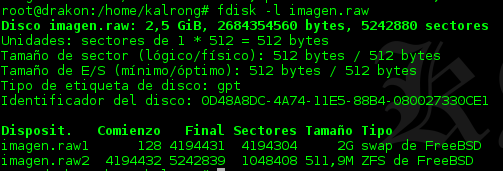
Looks like is a disk image, the next step would be to see what fdisk has to say:

Looks like almost everything is swap and we have a 500Mb partition in ZFS format. The problem is that ZFS doesn’t allow file I/O so we can’t directly mount it, first, we need to use losetup to mount it so ZFS could recognize it.
For that we need to calculate the offset of that partition, knowing that block size is 512 bytes and that the partition starts at 4194432:
512 * 4194432 = 2147549184
Once we know the offset we execute losetup as follows:
![]()
To proceed with the following steps we need to have installed and loaded the ZFS modules. In my case I had several version problems as the version used for the challenge was newer than the one in the repositories so I compiled the modules from the sources.
We use zpool to import the ZFS pool:

Zpool warn us that the pool was used in another system previously so we need to force the import with the -f option and also use its name (Mugar2x3); and then we confirm that the pool was imported:

With this the partition should be already mounted on our system’s root under the folder Mugar2x3. If this is not the case we can use the following command to mount it:
zfs mount Mugar2x3
We can see that it only contains several subfolders and a lot of files with the famous “Lorem ipsum”, but not a single picture that is what the challenge asks.
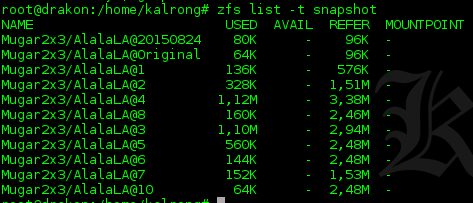
ZFS has the feature to generate snapshots to be able to recover old status of the file system, we take a look and we can see that there are several of them:

The snapshots are sort from older to newer, in the case that we miss we need to destroy and import the pool again.
In this case, judging by the size, our best option was the snapshot 3, so we proceed to do a rollback to it:
![]()
As we still have a lot of files in the middle I used the file command to locate the picture:
![]()
We open the file and voila:

We then calculate the SHA256 and we have solved the challenge.

